Saturday, August 28, 2010

Interesting Paper Photo Frames

17 Comments

Paper photo frames are easy to make picture frames and also lovely corner displays and table tops. In fact, making a paper frame can be a fun summer craft activity for kids. Handmade sheets, brightly colored bits and sheets with lots of crafty things can together form beautiful personalized photo frames. In the age of digital photo frames, handmade picture frames have a charm of their own as they carry warmth and special care of a person. Paper photo frames aptly fit the bill of being perfect personalized gifts. Besides, being eco-friendly picture frames, these are a trendy way to not only decorate the house but also safeguard the nature from the hazardous side-effects of non-degradable materials like plastics.

To know more about paper photo frames, click here.

To learn how to make paper photo frames for kids, click here.

Friday, August 27, 2010

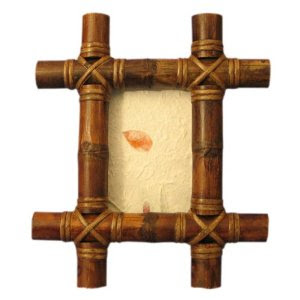
Making a Bamboo Picture Frame

0 Comments

A handmade article is always a bit special than the regular run-of-the-mill products. There is nothing more special than a handcrafted gift to your loved ones. Crafty photo frames are a great option to present as gifts to your near and dear ones. Here is a step by step procedure to make a bamboo picture frames at home. Check out how:

Step 1
First of all, zero onto the size of the picture frame. Using a measuring tape and saw, cut the bamboo sticks into desired length. Make sure the cuts on the edges are at a certain angle so that they carry a distinct appearance. Inter crossing the bamboo sticks simply at corners can be a great designing option.

Step 2
Next, chalk out the desired size of photo frame on a clean plastic sheet or acrylic glass. The size has to be few inches more than the size of picture to be inserted within.

Step 3
Apply a reasonable amount of glue on the areas excluding the photograph and lay down the bamboo sticks in the desired fashion to create a design for bamboo photo frame. Leave it for drying thereafter.

Step 4
Now, cut a sturdy piece of cardboard for giving base or supporting the picture frame from backside. Make sure you chop off the center part so as to let the picture be showcased from there. Basically, you will be having a hollow piece of cardboard to be placed on the back of the picture frame.

Step 5
If you need a hanging frame then stick a piece of ribbon in loop form on the back of it or else put few inches long bamboo pieces on either sides of the frame to make a wonderful table top. Ribbon loop or bamboo piece, make sure that you let it dry perfectly before using it.

Step 6
Lastly, add your favorite picture into the frame and gift it or place it on your bedside table or over the wall as a personalized picture frame.

To know more about bamboo picture frames , click here.

Thursday, August 26, 2010

Personalized Photo Frames - Perfect Gifts

3 Comments

Personalized photo frames can be a perfect gift if you are planning to present your near and dear ones a special gift item. The warmth and care of a gift inscribed with a personal message charms the receiver a lot more than the run of the mill gift items from market. One can opt from various kinds of picture frames to get the message inscribed and present it as personalized gifts to the loved ones on special occasions.

Sterling Silver
Sterling silver picture frames are one of the most favored photo frames amongst people. One can get the recipient's name or a personalized message engraved on it. Generally, there are specialized stores in market which deal in the engraving of names or messages on such frames. Pick your favorite sterling silver or silver plated photo frames and get your loved ones name engraved on it. The engravings can be picture specific as well. For example, if its a picture featuring you and your friend at your convocation party then the dates, name of the party and the names of you and your friend can be inscribed on it, making it a life long remembering moment.

Photo Collage
Photo collages make great personalized picture frames. It is actually assortment of pictures put together for a display. Now-a-days, personalized name photo collage frame is an innovative way of personalizing a frame. This particular frame type features a word of 6-7 alphabets with cut outs or openings for showcasing pictures. The word can be the name of the owner, or a special word associated with his life, just pop in a picture into it and you are ready with an artistically personalized picture frame.


Wooden Frames
Wooden picture frames also look extremely classy with the names or messages etched on it. These personalized frames are easily available in the market. In fact, one can get the message etched onto it by a local wood craftsman. Titles like sisters, best friends, family etc. are readily available at any of the regular gifts store.


For interesting personalized picture frame designs, click here.

Tuesday, August 24, 2010

Photo Frame Care Tips

0 Comments

Picture frames need care and proper maintenance for enduring a decent period of shelf life. One has to be careful enough with them to enhance their life period and maintain its durability for a relatively longer period of time. Mentioned here are the two key tips which can help you in the proper maintenance of your favorite frames. Check them out:

Cleanliness is Important
Just like other things, cleanliness is extremely important for photo frames too. One needs to do proper dusting and keep them absolutely spic and span in order to maintain its agility. The picture should be removed first while cleaning them. For metal ones like gold, aluminum or silver photo frames, one can try a damp towel to clean them. It is the best suited option for metal ones as it cleans the encasing without letting the frames loose its color and sheen. Make sure you use an A-grade silver cleaner as per the given instructions to clean the sterling silver and pewter picture frames. Test it before on a smaller section if it works well, go ahead, if not, well you are saved from ruining the entire piece. Regular cleaning elongates its life at the same time maintaining its attractiveness. Thus, a two minute job of wiping frames with a soft cloth daily can reap you quite a few years benefit.

Avoid Direct Sunlight
Direct sunlight is probably the most harmful things of all for picture frames. The UV rays emitting out of sunlight tarnish the original color and shine of ornate pieces. Thus, it should be tried not to put them or around the area which is prone to direct sunlight. Safeguard your photo frames from the UV rays by using a UV coating on acrylic or glass picture frames.

These two tips if followed regularly, can render the needed maintenance to your favorite decorative frame.

For more such informative articles regarding photo frames, click here.

Innovative DIY Picture Frame Ideas For Raksha Bandhan Gifts

33 Comments

Raksha bandhan is a festival which celebrates the loving bond of a brother and sister's togetherness. The fun, laughter, joys, fights; every single moment shared while growing up sums up on this special occasion. By tying a sacred thread or rakhi on her brother's wrist, a sister acknowledges the presence of a brother who is expected to be there for her through every thick and thin in life. The brother too can reciprocate the same feeling by presenting his darling sister with gifts.

This raksha bandhan surprise your sister by presenting her a handmade photo frame. Use your old CD and DVD cases for making a picture frame and see her get delighted on receiving such a heartwarming gift. It is quick to make and great to gift. Here are two different options to make a CD/DVD jewel picture frame for you sister. Check them out:

STAND UP JEWEL CASE PICTURE FRAME

Materials Needed
CD/DVD jewel cases
Card stock or matte photo paper
Double-sided tape
Scanner
Scissors
Your favorite photograph with your sister

Instructions
-Take a scratch free CD or DVD case and clean it well for use.
-Next scan and print the selected picture as per the size of the CD case.
-Now stick the picture within the jewel case using a double sided tape.
-Lastly, flip the front of the case towards the back so as to render a stand for the frame and voila! You are ready with a trendy CD jewel case photo frame to impress your sister!

Another option to surprise your loving sister is by making a jewel case photo display on her room's wall. Sneak into her room when she's not around and deck up a wall with an interesting photo display. Just watch out for her awestruck reaction on seeing it. Read on to know how.

JEWEL CASE WALL PHOTO DISPLAY


Materials Needed
CD/DVD jewel cases
Card stock or matte photo paper
Double-sided tape
Scanner
Scissors
Cherished photographs featuring you and your sister (number of pictures vary as per the requirement of arrangement on the wall)

Instructions
-Scan and print photos of a similar size on a card stock as per the CD case size.
-Place these pictures into the jewel cases using glue.
-Try Various arrangement on floor to settle onto the final arrangement design to be put up on wall.
-Then stick these frames in the chosen fashion on the wall using a double sided tape. You are done with a personalized wall.

For more DIY photo frame crafts and ideas, click here.

Friday, August 20, 2010

Handmade Wooden Photo Frame

1 Comments

Wood photo frames are beautiful encasements for encasing your some of the most prised and cherished moments. Besides being a protective layering for your favorite photographs, wood photo frames also serve as beautiful home decor items. Being able to blend with all kinds of interiors of furniture, these frames are indeed a must-have item for every household. Though a nice and elaborate wooden picture frame at times can cost an earth hence, the other alternative available is to design and create a frame on your own. Apart from being pocket friendly, a handmade photo frame would a lot more special than the regular run-of-the-mill frames.
Presenting here is a step by step procedure to make a wooden photo frame at home. Check it out:

Step 1
The very first thing to do is to select your favorite wood form. Pick up the wood whose grain you find the best as in, the one which attracts you the most. Pine, oak, mahogany etc. can be some of the options to pick from. Make sure that the wood you choose, is enough for covering each side of the photograph to be framed with an extra inch of length.

Step 2
The next step is to cut out four different pieces of wood precisely at 45 degrees so as to fit them appropriately in a square or as per the size of the picture to be framed. Each of this wood piece is supposed to have 45 degrees of cuts going outwards. The joints can be secured using finishing nails or staples.

Step 3

Now, to add life to the frame, paint it using stain or the paint which matches well with your house interiors. Paints and stains are quite easily available at any of the regular hardware shop, that too at quite an inexpensive price.

Step 4
Finally, for placing the picture within the frame, first add a sheet of transparent plastic on the back of the frame. Paste it well with a strong adhesive. Once it has dried out completely, add the picture over it and a mat board onto it thereafter. Secure the mat board backing with nails so that the picture is well framed and protected in between the transparent sheet and mat board.

Step 5
Now screw in two metal rings on either side of the frame and run a thin rope string through it to hang the frame on the wall.

You are all set with a handmade wooden picture frame for gifting or using it at your own home.

To get detailed information about reclaimed wooden picture frames, click here.

Thursday, August 19, 2010

Making Picture Frames Using Corrugated Metal

0 Comments

Metal picture frame always tend to attract attention with their intriguing appeal. A handmade metal frame can be all the more appealing for the special efforts put into its making. In fact, these handmade metal frames can be great gift options too. Here is a step by step procedure to make a metal photo frame using a couple of inexpensive items. Check it out:

Material Needed
  • Offset metal snips
  • One 1/4-inch by 1/4-inch corrugated metal
  • Measuring tape
  • Ruler
  • Razor
  • Knife
  • Two picture hangers
  • Cardboard
  • Construction strength metal adhesive

Step 1
First of all, find out the exact length and width of the photograph that you plan to frame in this particular handmade photo frame.

Step 2
Zero onto the size of picture frame which can vary with the size of pictures. For example, a small picture would do well within a 1 or a 1 and a half inched wide frame, while the larger picture would look balanced only in a 2 to 3 inched wide frame.

Step 3
Now, the actual measurements are required to be added with an extra margin of approximately three times the actual sizes on each side. The frame pieces would be cut out from a 1 ¼ inch by ¼ inch of corrugated metal with offset metal snips which can cut straight or angled cuts.

Step 4
Now place the two side pieces as per the width of the photograph. For example, if the given picture is six inches wide, then the two side pieces should be placed at a distance of six inches from one another.

Step 5
The next thing one would need to do is, etching a fold line of 45 degrees onto the back of the ends of top and bottom pieces. The etching on metal frame can be done using the tip of a razor knife and ruler as a guide. Further, put some metal adhesive on the fold lines and fold the corner of the pieces along the marked etchings to create a 45 degrees angle towards the frontal part of the top and bottom pieces. The folded frame pieces need to be trimmed using metal snips, thereafter. Leave the pieces for drying.

Step 6
Now, paste the top and bottom frame pieces with the side pieces using metal adhesive. It should be forming a proper shape as per the picture.

Step 7
Next, cut a cardboard sized half an inch shorter than the overall dimensions as compared corrugated metal frame.

Step 8
Stick your picture onto the cardboard using an acid free tape and paste this frame base at the back of the corrugated metal frame with the help of metal adhesive. Allow it to dry.

Step 9
For hanging the frame, stick two picture hangers at the back of the frame and well, you are ready with a handmade metal picture frame!

To learn how to embellish a metal picture frame with buttons (DIY article), click here.

Tuesday, August 17, 2010

Glass Vase Picture Frames

2 Comments

Glass vase picture frames happen to be the latest innovation in glass photo frames industry. Its an innovative way of displaying the picture in combination with flowers towards the top. Most of the glass photo frame manufacturers and suppliers these days are pitching in the customers through this unique product.

Glass vase photo frames serve the dual purpose of being a picture frame and a flower vase at one go. Besides, it has an added dimension of being an attractive centerpiece. These make lovely home decor items and thus, can be perfect wedding gifts. In fact, these also make a great gift option for bridal party attendants. Give away the glass vase picture frames as a farewell gift to the party attendees and see them delighted to receive these frames as gifts.

All kinds of interior can be accentuated with the use of these vase frames. They are often available in cuboid shape as the picture fits in perfectly within the square space and the hollow cuboid box allows the placement of flowers quite well. The glass cube generally measures 4" by 4" by 4 inches and the picture frame allows a picture sized 1.5" x 2" to set within. Though the sizes and shapes can obviously vary with the difference in makers and manufacturers. In fact, custom sized glass vase can also be sourced from any of the leading glass picture frame manufacturers and suppliers.

An added feature to these glass vase frames is that these frames can be engraved with custom message or note to add a personal touch to it. Crafted in combination of glass and metal, the engraved message can easily be carried onto the metal part to make it all the more unique and personalized.

One can buy the glass vase photo frames from various online shopping sites. For example, the gifts site- engraved gift creations, offers these frames at reasonable prices.

For more on frosty glass photo frames, click here.

Monday, August 16, 2010

Suzani Embroidered Photo Frame: Product Review

1 Comments

Embroidered Picture Frames are admired and favored the most for the finesse of hand embroidery. The beautiful designs crafted by skilled hands are a treat to watch and to possess as well. This is probably the main reason for the popularity of embroidered picture frames all over the world.

All the leading home decor or home furnishing stores make it a point to keep ample amount of options in hand crafted furnishings so as to lure the art lovers. Embroidered photo frame is one such product which is sought by a number of people, given the finesse and beauty of such hand crafted picture frames.

Suzani, a leading home furnishing brand has come forward with an assortment of embroidered photo frames to add a dash of elegance and beauty within the ordinary interiors of a house.

Colors Available
Suzani's embroidered picture frames are available in a combination of three different colors namely forest green, orange and chocolate shade. All the three colors are rich and easy to go with all sorts of interiors. In fact, they are artistically blended with other contrasting shades like brown, white and yellow.

Sizes Available
Suzani embroidered photo frames are available in two sizes viz 5x7 in portrait and 8.5x10.5 in landscape size. Though the sizes may vary from one another but they all are made to frame a 4x6 sized pictures.

USP
The unique selling point or the USP of these frames is that they are hand crafted with utmost finesse and neat embroidery. Given the graceful designs that they carry, they are a must have for every kind of interior.

For more on hand embroidered photo frames applique designs and details click here.

Waste Card Mosaic Photo Frame

0 Comments

Mosaic photo frames make use of absolute waste material for designing. Broken ceramics, arbitrary shaped mirror chips, non-stringed beads etc. are perfect for making mosaic photo frame. Just make your creativity run wild and let a plain frame take its shape as a lovely mosaic photo frame. Presenting here is a step by step procedure to create a mosaic picture frame using expired gift cards, credit cards, club cards, health insurance cards etc. Check it out:


Material Needed
  • A Wooden Frame
  • Glue Gun
  • Expired plastic cards like subway cards, health insurance cards, gift cards, credit cards etc.
Step 1
First of all, lay a newspaper on and around your work area. Now, take the old wooden frame and brush off the dust and dirt to make it a neat, usable frame.

Step 2
Next, cut the old credit cards, gift cards, subway cards etc. into tiny pieces with the help of a knife or sharp scissors.

Step 3
Arrange the card pieces in the desired fashion. The pieces can be arranged in a particular design pattern or arbitrarily, as per your desire.

Step 4
Once the design pattern is set, start picking one piece at a time and stick it as it is on the frame using a glue gun.

Step 5
Make sure that the glue has dried out completely before use or else the card pieces would end up chipping or falling off from the frame. All done, well, you are ready with a waste card mosaic photo frame!

For more on mosaic photo frames and beautiful mosaic picture frame designs click here.

Friday, August 13, 2010

Making a Jeweled Photo Frame

0 Comments

People of all age groups love to do the small little crafty things. Creating something innovative out of useless pieces from trash is indeed fun every time. One of these best-out-of-waste products can be a photo frame created out of an assortment of waste material. In fact, making jeweled picture frame can be a perfect personalized gift, so as to present it to your loved ones on special occasions. Here's a step by step procedure to make a jeweled photo frame using faux jewels and old discarded picture frames.Check out how:

Material Needed

-Faux jewels, rhinestones, crystals etc.
-Small acrylic paint bottle
-Paint brushes
-Frame base (wooden or glass)
-Wet washcloth
-Craft glue

Step 1
First of all, following the golden rule, cover the working area with a newspaper. Now, detach the glass from the wooden frame and keep it aside. Then hold the frame steady and paint it using a medium sized paint brush. Make sure you paint it in the wood lines direction.

Step 2
Once the first coat has dried, paint the inside edges and the remaining portions and corners using a smaller brush and let it dry.

Step 3
Now, after the entire frame is painted evenly and dried as well, arrange the faux jewels, rhinestones and whatever jewels etc. you want to display on the frame in the desired pattern.

Step 4
Next, pick up each jewel and stick onto its appropriate place one by one. Thereby, completing the design on the frame. Let it dry.

Step 5
Lastly, add a ribbon loop at the back of the frame to facilitate hanging.

You are ready with a jeweled photo frame to use it as a table top or to gift it to your loved ones.

For exquisite jewel photo frame designs click here.

Thursday, August 12, 2010

Elegantly Beaded Silver Photo Frame : Wedding Day Gift

0 Comments

Photo frames happen to be perfect gift items for weddings. Its a favored gift item to newly wed couples for they can frame in their beautiful wedding day moments or the lovely moments of the life ahead into gorgeous picture frames. Though this particular gift item can become all the more special if one adds a dash of personal touch to it by handcrafting the same.
Here are some quick step by step instructions to create an elegantly beaded silver photo frame. Gift it to your friends or relatives on their wedding day to encase their loving memories in it. They would surely be delighted to receive a special handcrafted beaded photo frame your side.

Material Needed
  • A picture frame with smooth edges
  • Glue that can adhere the glass stiffly and dry clear
  • Silver acrylic paint
  • Assorted seed beads in silver
  • Hot glue gun
  • Newspaper to cover your workspace
  • Acrylic finishing spray

Procedure

Step 1
First of all dismantle the frame by removing the glass and backing from the frame. Now paint the frame structure with silver acrylic paint using a soft paint brush. Be sure that the color is applied in a single direction and is not uneven at any point.

Step 2
Once the coating is done, let it dry completely. Apply a second coat if needed, but only when the first one has dried out thoroughly.

For the rest of the article, read here.

Tuesday, August 10, 2010

Sony's Swarovski Crystal Studded Photo Frames

0 Comments

Sony's swarovski crystal studded photo frames are the most happening thing for every living room which boasts of technology and glamor. These are extremely classy crystal photo frames laced with the latest digital picture frame features.

Each piece of Sony's swarovski crystal studded photo frame is a 7 inch digital frame beautifully done up with Austrian-made swarovski crystals. Launched in only two colors i.e. DPF-D75 (WZ) in white and the DPF-D75 (BQ) in black, these swarovski photo frames have an astounding WVGA display with a magnificent resolution of 800x480.

For complete review, read here.

Saturday, August 7, 2010

Pewter Baby Picture Frames

0 Comments

Pewter photo frames are characterized by a charm of their own. The silverish metal somehow makes a statement of its own and when they are molded in specifically for a purpose the attractiveness just doubles up. One of its examples are pewter baby frames. Pewter picture frames made specially for showcasing a baby's photographs are the beat way to highlight the unforgettable cute moments of your little one. Available in an array of specialized designs, pewter baby photo frames make perfect baby shower gifts as well.


The frames are designed with shapes associated with babies like teddies, clowns, toys etc. This kind of styling not only make the frames attractive but also add that special feature of exclusivity to these frames.

Read the rest of the article here.

Thursday, August 5, 2010

Making a Picture Frame out of Broken Ceramics

0 Comments

A broken ceramic article can be used creatively for making a lovely best-out-of-waste kind of picture frame. The tiny pieces together can be arranged in an array of beautiful design to create a personalized picture frame. Check out how:

Materials Needed
  • A broken ceramic article like a vase, tiles etc.
  • A plain picture frame, preferably a cardboard one
  • Mosaic glue
  • Tile grout

Procedure

Step 1
First of all figure out what size of pieces would fit the kind of design you are planning on the picture frame, accordingly, squash the broken raw material available.

Step 2
The relatively larger pieces need to be squashed carefully. The best way to break the bigger ceramic pieces is by placing them within a pillow case or an old sock and tap them tactfully with gentle hand movements using a hammer. Make sure you don't end up breaking them into a size which can not even be picked. Stop the moment pieces are apt enough to lie flat on the picture frame surface.

Read the rest of the article here.

Wednesday, August 4, 2010

Framing Memories With Brass Picture Frames

0 Comments

Brass picture frames are known for their aesthetic designs and vintage feel. They make classic table tops and wall decor items. In fact, brass photo frames tend to attract attention instantly, given the highly sophisticated look they provide to the entire interior. Have a look at some of the brass picture frame designs here:

Antique Brass Photo Frame
Antique brass photo frames are the brass frames designed, molded and sculpted as per the original antique picture frame styles. The designs depict the example of traditional art work with flawless craftsmanship and intricate carvings.


Jeweled Brass Photo Frame
Jeweled brass photo frames are the brass frames decorated with sparkling swarovskis, stones etc. to add a dash of brightness to the entire frame. These make beautiful embellished home decor items.


Read the rest of the article here.

Tuesday, August 3, 2010

Handmade Jeweled Picture Frames

1 Comments

Jeweled photo frames are beautiful art pieces to lock your cherished memories in a dazzling case and these become all the more special if you add a dash of personal touch to it. One can easily make a handmade jeweled picture frame at home using a couple of things. Here's a quick step by step procedure to make a handcrafted jeweled picture frame at home. Check out how:

Material Needed:

  • 1 sheet of colored cardboard
  • 10 to 20 faux jewels, rhinestones, beads etc. in different shapes and sizes
  • 1 photograph
  • 1 holder pin
  • Newspaper
  • Pencil
  • Scissors or craft knife
  • Craft glue

Step 1
First of all cover up your work area using a newspaper or an old table cloth. Now draw the desired shape on the cardboard with the help of a pencil. Once the shape is done cut it out and trace the same shape again on the remaining cardboard. Cut out this shape too and you will be ready with two similar cutouts.

Step 2
The next thing to do is to carve out the frame. For that, draw a relatively smaller shape(as that of the cut out cardboard itself) pattern on one of the cardboard sheets. Cut it out and you'll be ready with a hollow frame.

Read the rest of the article here.